MacOS is known for photo and video editing as the best captures are done with iPhone and can be easily synced with MacOS. MacBook has an inbuilt video editor that is good enough for small edits however if you need a professional touch, you can use one of the Best Video Editors for Mac.
Third-party video editors can unleash multiple features and options to bring out your creativity and personalize your videos. You can add different filters, frames, and objects before you finalize your videos. You can create advanced videos with multiple features using a power-packed tool. You can use these videos for tutorials, presentations, or webinars to showcase your work.
Edit Video Using QuickTime Player
QuickTime Player is the default video player in MacOS versions. It also offers some basic editing features that can help you make small changes and save the edited videos.
Step 1. Access QuickTime Player on your Mac using the Spotlight search bar or the Dock.
Step 2. Click on the File menu and select “Open File” to open the video in the player. You can also drag and drop the video file into the QuickTime Player window.
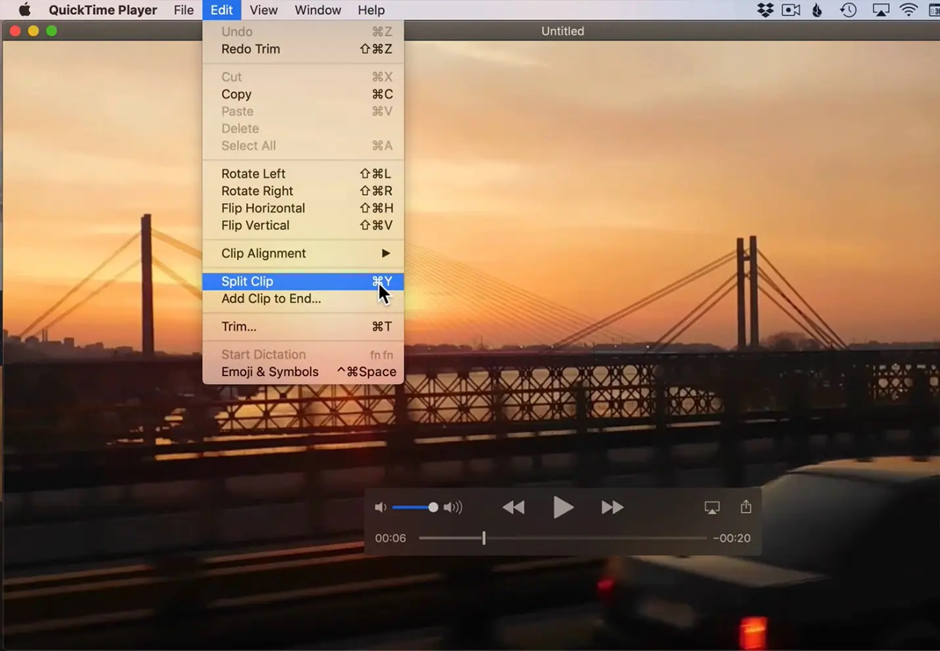
Step 3. Make required changes like trimming the video, splitting the video into multiple parts, or removing a specific section from the video. You can perform the below actions when the video is loaded in the QuickTime Player.
Trim the Video – Click on the timeline and drag the yellow handles to set the start and end points of the section you want to keep.
Split the Video – If you want to split the video into multiple parts, move the playhead to the desired position and go to the Edit menu and click on the “Split Clip” option. You can repeat this step for multiple splits.
Remove a Split – If you wish to delete a specific clip, ensure that you split the clip first and then select the segment and press the “Delete” key.
Step 4. Once you’re done with the editing part, now it’s time to save the video in the desired format. Click on the File menu and select the “Save” or “Export As” option. Ensure you select the right output format and location to save the edited video. Click Save to save the edited clip.
Edit Video Using iMovie on Mac
The latest versions of Mac offer iMovie which has advanced video editing features on Mac. You can follow these steps to edit videos on your MacBook.
Step 1. Access iMovie from the Spotlight, launcher, or the Applications folder.
Step 2. Click on the “Create New” button and select “Movie” to create a new project. Give a name to your project and select the appropriate aspect ratio and frame rate that fits your video requirement.
Step 3. Now it’s time to import a video clip. Click on the “Import Media” button to browse and select the video or drag and drop video clips from your video library. You can use single or multiple clips to edit a video.
Step 4. Drag the video clips on the timeline to arrange and reorder your new video project. You can drag them to the left or right on the timeline.

Step 5. If required, trim video clips by dragging and selecting just the required section. Click on the “Crop to Fill” button. You can also drag the yellow handles to select the desired portion and apply settings.
Step 6. You can add transition effects between the clips and adjust the duration or positioning.
Step 7. Give a title, and add text, shapes, or objects to your videos. These objects will appear above the video clip in the desired position. Adjust the duration and the position of the titles on the timeline.
Step 8. Apply some video effects, filters, and sound to give a magical touch to your video. You can add music with effects to fade in or fade out.
Step 9. Preview your video project before finalizing it. If there are no more changes required, you can save the video clip and share it right from the File menu. You still have the option to select the desired output, resolution, format, and compression of your video.
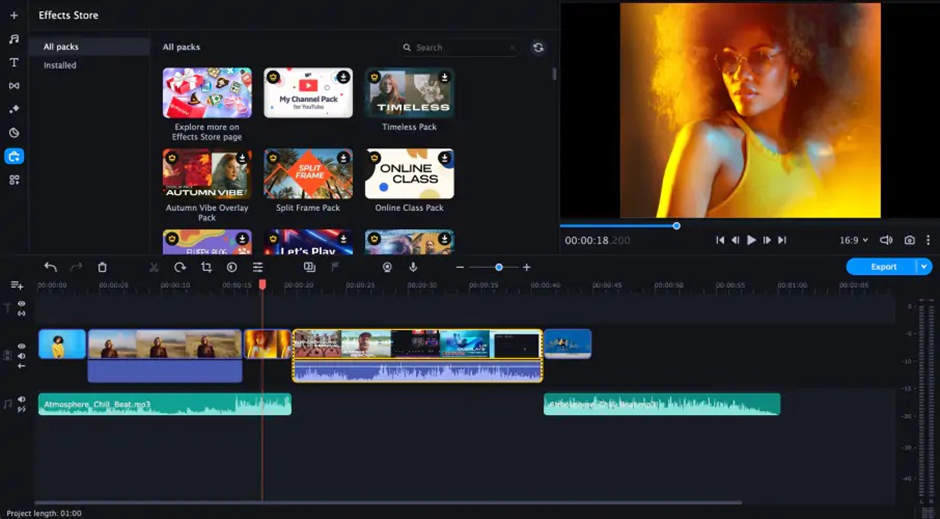
Edit Videos Using Movavi Video Editor for Mac
Movavi Video Editor for Mac is one of the best video editors that you can use to create intuitive videos. It has all the advanced features that you can look for in a video editor. Here are a few factors that you should consider while choosing the Best Video Editor Features for Mac.
There are dozens of video editors available for Mac. We should consider some features that should be available to offer advanced video editing capabilities. Here is what we prefer!
User-Friendly Interface
The best video editor for Mac should have an excellent user interface for easy navigation. All the preferences and features should be clearly visible on the main console. You should be able to edit and save drafts or download them right on the main console.
Advanced Features & Functionalities
Advanced video editors will offer intuitive features and functionalities that meet all your requirements. You should be able to find the best tools to trim videos, cut, crop, merge, and add transitions. It allows you to add special effects, supports the green screen, performs color correction, and adds audio editing effects to the videos.
Compatibility with Multiple Video Formats
Compatibility with multiple video formats is also a consideration that you should think about. You should be able to input multiple video formats, process them and then get the output in the desired formats that meets your requirements on a Mac. This freedom will allow you to work with multiple video file formats from different devices.
Stability and Better Performance
The best video editor will always work seamlessly on all your projects. You can swiftly upload, edit and download with applied changes without struggle. The editing software should not stuck, hang or crash during the editing process to avoid rework or loss of edited videos.
Quality and Export Options
Many video editing software are not compatible to work with 4K or Ultra-HD output. The best one should be able to work with Ultra-HD videos and give an output of 4K/8K video format. The video quality should be optimum and it should support all the video file formats.
Best Plans & Pricing
The best video editor should fit into your budget and give you different plans and pricing options. You should be able to select the features you need and should be able to opt for the best plans and pricing.
Conclusion
There are several methods to edit videos on Mac. you can use the inbuilt utilities like QuickTime Player for basic editing or use iMovie for advanced editing options. If these utilities are not good enough to create professional videos, you can make use of Movavi Video Editor for Mac. It has got advanced editing features and filters to create amazing videos.
Also Read- counter.wmail-service.com